
Introduction:
When it comes to gardening, few plants offer the same mix of aromatic fragrance, delicate appearance, and edible benefits as dill. Whether you’re a seasoned gardener or just starting, growing dill is a straightforward task that can bring joy and flavor to your dishes.
I’ve personally found that dill is a favorite herb, and I love having it available throughout the growing season to add a little spice to my meals. Its feathery foliage and yellow flowers are a beautiful addition to any garden, not to mention the healthy harvest it provides for everything from soups to steamed vegetables.
The key to growing dill plants successfully is making sure they get enough sunlight and well-drained ground to grow in. Dill thrives in raised beds or directly in the soil, but it’s important to plan ahead for its needs. If you’ve never grown it before, be prepared to watch it grow rapidly, producing new growth as long as you care for it properly.
Dill is a wonderful herb to use in dishes like potato salad, pickles, or stews, adding a burst of flavor to everything it touches. It’s also an excellent herb for beginners due to its easy care and ability to withstand various weather conditions.
Throughout the growing season, keep an eye out for beneficial insects such as ladybugs and green lacewings, which are attracted to dill for its flowers. These insects are great at controlling pests like aphids, which might otherwise damage your plants. If you’re lucky, you may even spot black swallowtail caterpillars feasting on your dill, as this plant is a host plant for their larvae.
But don’t worry – it’s a sign of a healthy, thriving garden. It’s important to trim your dill plants to keep them bushy and prevent them from becoming leggy. This will encourage more fronds and an abundant harvest.
For those who like to preserve their harvest, dill is ideal for drying. The seed heads can be collected and stored in jars for later use in cooking. You can also save the dried dill for making pickles or adding to your favorite dishes.
If you’re an experienced gardener, you’ll know that dill weed is an incredibly versatile herb that can even be used in pickling or as an addition to flavor up dishes like fish or sauces. The possibilities are endless with this herb that promotes health, flavor, and the joy of growing your own food.
How to Prune Dill
To prune dill, trim the top leaves to encourage bushier growth, remove excess stems, and pinch off flowers to prevent seeding. Regular pruning promotes healthy growth, more leaves, and a steady harvest. Always leave at least 2/3 of the plant intact.
Understanding the Dill Plant
Physical Appearance:

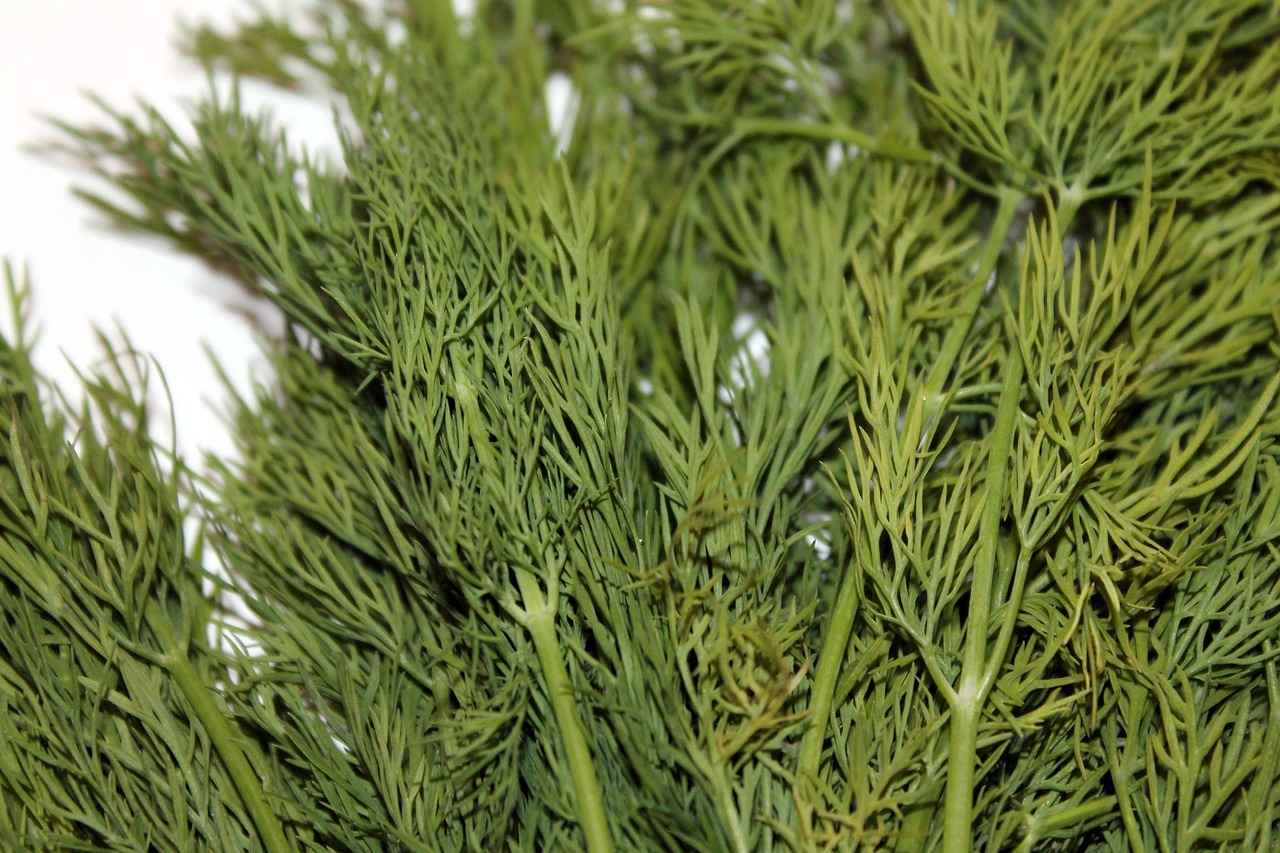
The dill plant is truly a beautiful addition to any garden, with its slender stems and feathery leaves that give it a soft, delicate appearance. As it matures, the plant produces bright yellow dill flowers that form in dill heads, which eventually cascade down as they grow.
The leaves themselves are a vibrant green, creating a lovely contrast with the bright yellow blooms. The dill flowers are not only delicate but also attract beneficial insects like ladybugs, making them an essential part of the garden ecosystem. As the plant continues to grow, the dill becomes more lush, offering a striking visual alongside the produce it provides.
Life Cycle & Growth Patterns:

The dill plant follows an annual growth cycle, typically completing its life in a single year. Depending on the growing conditions, it can reach a height of up to 4 feet, with tall, slender stems and fresh herb leaves that provide flavor to various dishes.
During its growth phase, it’s important to make timely decisions about pruning to encourage more growth and prevent it from becoming leggy. In some cases, dill may also self-seed, allowing the plant to return the following season. Knowing when to harvest and making additional decisions on its care will help you get the most out of your dill.
When planting dill, it’s key to ensure it has enough space and sunlight to reach its full potential. The growth pattern of dill can vary slightly depending on the variety you choose, but with the right care, it will thrive and produce abundant leaves and flowers. Providing the plant with the right conditions and regularly harvesting will allow it to flourish and help you maintain a steady supply of fresh dill for your kitchen. The beauty of dill lies not just in its flavor but also in how timely attention can turn a simple herb into a garden star.
Providing the plant with the right conditions and regularly harvesting will allow it to flourish and help you maintain a steady supply of fresh dill for your kitchen. The beauty of dill lies not just in its flavor but also in how timely attention can turn a simple herb into a garden star.
Culinary & Medicinal Value:

Dill has been traditionally revered not only for its flavor but also for its medicinal properties. Commonly used in pickling, the seeds and leaves of the dill plant are known to combat digestive issues like stomach discomfort and can even help with minor ailments.
The dill weed adds a distinct spice to dishes, while its medicinal benefits are used to alleviate issues such as bloating and indigestion. In the kitchen, dill is a versatile herb that enhances everything from soups to salads, but its uses extend beyond just culinary purposes, making it an essential addition to any garden.
Growing Conditions:

To grow healthy dill, it’s essential to provide the right conditions. Dill prefers full sunlight and well-drained, slightly acidic or neutral soil with a pH level that is not too extreme. Dill can tolerate some dry spells, but regular watering is still required to keep the plant happy, making sure not to overwater and cause waterlogging.
In humid regions, special care is needed to avoid excess moisture, as this can lead to problems. The plant can thrive in Florida or other warm climates, but it’s important to be cautious and avoid planting it in shade or very humid conditions, as this can stunt its growth. Keeping these key factors in mind will ensure dill has the perfect environment to flourish.
Companion Plants:

When planting dill in your garden, it’s a good idea to pair it with friendly neighbors like lettuce, carrots, and tomatoes. These plants work well together because they don’t compete for the same resources, allowing each one to thrive. Dill also makes a great companion for cucumbers, as it helps attract beneficial insects that protect the plants.
On the other hand, keep in mind that dill doesn’t always make the best neighbor for cucumbers and tomatoes, as it can sometimes hinder their growth. So, be cautious and plan your garden layout with attention to how these plants interact.
Why Prune Dill?

Pruning your dill is important for optimizing the plant’s growth and ensuring it reaches its full potential. By dedicating some time to trim back the plant, gardeners can encourage healthier, bushier growth rather than allowing it to break or become too leggy. Dill, being a hardy herb, naturally grows in a way that can get unruly if not properly managed.
Controlling its growth through pruning helps to fend off any issues and keeps it from overtaking the garden. By removing excess stems and leaves, you’re giving your plant the essence of good care, allowing it to thrive in its natural, healthy form.
Vigor and Health:
Investing time in pruning your dill plant is key to maintaining its overall health. By removing damaged or yellowed leaves, you’re diverting the plant’s energy into producing new growth instead of sustaining old leaves. This process not only encourages healthier growth but also ensures the plant can focus its resources on its core needs, leading to a vibrant and vigorous plant.
Regular check-ups and pruning will keep your dill from becoming overwhelmed, supporting a steady growth cycle and making sure your plant stays in peak condition throughout its life.
Maximizing Harvest:
To maximize your dill harvest, pruning and trimming the plant regularly is essential. By strategically cutting back old stems and leaves, you encourage more branching, which leads to a fuller, more productive plant. As a gardener, I’ve found that this not only increases the yield but also ensures a steady supply of fresh dill throughout the growing season, perfect for using in the kitchen.
Keeping the plant well-maintained encourages healthy new growth and gives you more opportunities to harvest its delicious leaves. This process helps dill thrive and keeps it looking great in your garden, while providing a continuous supply of flavor-packed herbs.
Controlling Height:
Controlling the height of your dill is important, especially when growing it among neighboring plants. Left unchecked, dill can grow quite tall, potentially overshadowing other plants and taking up too much space in your garden. Regular pruning helps keep the plant from getting too tall and ensures it doesn’t crowd out neighboring plants.
As an enthusiastic gardener, I’ve learned that controlling the height allows for better air circulation and premium growth, especially when using systems like aerogardens. This method keeps dill from growing too wild and allows it to thrive without dominating its surroundings.
Seed Production:
Dill plays a pivotal role in seed production if you aim to collect seeds for future planting. After pruning and selectively removing certain stems, you can allow the dill to flower, which encourages the plant to produce prolific amounts of seeds. These seeds are great for culinary use or for future planting.
When considering how soon seeds begin to germinate, keep in mind that dill seeds typically sprout in about 7 to 10 days under the right conditions. By allowing the plant to go to seed, you create a sustainable cycle, ensuring a steady supply of dill for years to come. The seeds harvested from the mature flowers are key to growing a new generation of dill.
Aesthetic Appeal:
Dill adds an artistic touch to your garden, with its attractive feathery leaves and delicate flowers. Whether in an indoor or outdoor setting, this well-pruned plant brings beauty and a unique look to any space. Not only does it enhance the overall looks of the garden, but it also serves practical purposes, like attracting beneficial insects.
Dill can be a great addition for gardeners who want to combine both function and beauty. Its manicured appearance and graceful structure are perfect for those seeking a more refined, better balance in their planting design.
Preventing Disease:
As a gardener, understanding the importance of creating a healthy growing environment for your dill is key to preventing disease. Proper pruning and avoiding overly dense growth can reduce the chances of fungal infections and other diseases that thrive in moist conditions.
Ensuring good airflow and circulation around your plants helps prevent the buildup of excess moisture that amplifies the risk of disease. Keeping your dill plants well-spaced and focused on proper growth allows them to thrive, making it easier to control potential diseases without excessive intervention.
A regular routine of checking for any signs of disease and removing damaged parts ensures that your dill stays healthy and productive. As a passionate gardener, I’ve found that this proactive care not only improves the health of the plants but also increases their productivity, offering fresh dill for your recipes throughout the season.
By mastering the balance of proper care and good growing conditions, you’ll enjoy healthier plants, all while reducing the likelihood of diseases affecting your garden.
Before You Get Started

Before you start growing dill, there are a few important guidelines to keep in mind. It’s essential to know when to prune and how much to trim. If you’re growing dill for edible leaves, you may want to pinch back the stems early on, which will help prevent the plant from becoming too tall or flowering too soon.
This allows the plant to focus on healthy foliage growth and fronds. Be careful not to over-prune, as this could damage the plant and prevent it from being able to regrow properly. Ideally, wait about six to eight weeks after planting before trimming, to ensure the plant has enough time to establish itself and start producing healthy leaves.
As your dill nears maturity, it’s important to recognize when to stop trimming. Once you see buds or flowers beginning to form, it’s a sign that the plant is ready to reproduce and produce seeds. Don’t trim dill at this stage, as it will use its energy to flower and set seeds, completing its life cycle.
The key is to allow the dill to grow naturally, following its form and size, so it can thrive throughout its life. Whether you’re growing dill for its leaves or seeds, the right care at the right time ensures a healthy harvest.
Gather Your Tools:

Sharp Scissors or Pruners: Before you start planting dill, it’s important to gather your tools. A sharp pair of scissors or pruners is essential for trimming your plant. Using sharp pruners ensures a clean cut, which minimizes damage to the plant and helps prevent the spread of diseases.
A clean cut also reduces the risk of infection and encourages healthy growth. Having the right tools, like sharp scissors, not only gives you more control but also helps maintain the overall health of your dill.
Identify the Right Time:
Knowing when to prune your dill is important to encourage healthy growth and maintain its shape. Start pruning early in the season to prevent the plant from growing too tall and becoming leggy. By cutting back the leaves and branches regularly, you can help the plant grow bushier and promote more branching.
When your dill reaches about 12 inches, it’s the perfect time to prune, as this will help it maintain a compact shape and ensure a more productive harvest later on. Regular pruning throughout the season ensures that the plant keeps producing healthy leaves and stays vibrant.
How to Prune Dill for Growth.

To ensure your dill plant grows in a healthy, productive way, it’s important to prune it correctly throughout the season. Start by snipping off any old or damaged leaves at the base of the plant. This will help encourage the dill to focus its energy on the fresh growth. You can also cut the stalks down slightly to maintain a bushier appearance.
This method prevents the plant from becoming leggy and encourages more branching. Pruning the upper part of the plant also helps to promote a more compact form, instead of it growing taller than necessary. If you’ve ever used pruning techniques for apple trees, you’ll find that the same principles apply—removing excess growth encourages more productive and healthy plants.
Pruning is key to maintaining the vital health of the dill plant. By removing the fronds from the top, you not only prevent it from becoming too tall but also promote a more bountiful harvest of fresh dill later on. When you cut, use a pair of sharp shears to ensure a clean cut, reducing the risk of damage and diseases. Be mindful not to remove too much, as the plant still needs its leaves for photosynthesis. Regular pruning also encourages new sprout growth, which means you can enjoy fresh dill in your kitchen for months.
By pruning dill regularly, you’ll notice the plant becoming bushier and more productive, producing plenty of fragrance and flavor for your recipes. Dill can be used in everything from pickles to salads, and even casseroles. As you continue to prune, it will help your dill grow stronger, giving you a steady supply of fresh herbs throughout the season. The scent and taste will fill your house, making it a favorite addition to any dish.
Pruning dill not only supports the plant’s health but also helps it maintain its form and continue producing bountiful fronds that enhance your garden and your kitchen. Just remember to cut the top stems and leaves to keep it from becoming too tall or overly leggy. With a little watchful care, your dill plant will thrive, offering fresh dill for all your culinary needs.
Trim leaves from the top to encourage bushier growth:
To help your dill plant grow bushier, trim the leaves from the top rather than letting them grow upward. Using your fingers or a pair of scissors, cut off the tiny leaves at the top of the stems. This will encourage the plant to focus its energy on developing more outward branches, rather than growing taller.
By removing the top leaves, the plant will start producing more fern-like foliage along the main stems, giving it a fuller look. Regularly trimming in this way helps dill grow stronger and more productive over time.
Pinch off small branches here and there for flavoring your food:
When you’re ready to use dill in your cooking, simply pinch off a few soft branches with your fingers to add flavoring to your dinner. You don’t need to pull too much; a few small sprigs are enough for most recipes. Be careful when doing this so you don’t hurt the plant.
Pulling the branches gently doesn’t cause any trouble for the dill, and it keeps the plant growing strong. This method of removing small branches helps you enjoy fresh, aromatic dill without harming the plant or disturbing its growth.
Leave at least 2/3 of the plant when pruning:
When pruning your dill, it’s important to leave at least 2/3 of the plant intact. If you cut off too much, the plant may wither or not have enough leaves to gather energy from the sun. Pruning should be done carefully to remove only the excess growth, giving the plant enough chance to regrow and continue producing.
By leaving a good portion of the plant still standing, you ensure it has the strength to keep growing, and you don’t take away more than it can handle. When harvesting, always make sure you leave enough of the plant behind to support its ongoing growth.
Prune or harvest all throughout the season:
To get the best out of your dill plant, it’s important to prune or harvest regularly throughout the season. Pruning can be done at various times to remove heavily growing parts and encourage the plant to grow more green leaves. You don’t need to wait until the plant is fully mature—you can start harvesting the dill once it reaches about 8 inches tall.
Even before dill starts to flower or produce seed, you can prune it to ensure it keeps growing strong. Regularly pruning allows you to use fresh dill in your kitchen, while also helping the plant stay healthy and prevent it from becoming too overgrown.
Managing Flowers.

When growing dill, managing its flowers is crucial to encourage more leaf production. As the plant begins budding, you can pinch off the early flowers to prevent them from fully blooming. This action helps the plant focus its energy on producing more leaves rather than seeds, which can reduce the plant’s growth potential.
If you allow the dill to mature and flower, it will eventually form seeds, but removing the flowers early on ensures you get a longer harvest of fresh, flavorful leaves for your kitchen.
Pinch off flowers to keep the plant from going to seed:
To keep your dill from going to seed, it’s a good idea to pinch off any flowers as soon as they appear. Simply nip the tiny flowers at the top of the stem or branch before they turn into seeds. By removing them early, you prevent the plant from producing yellow clusters of seeds that could eventually drop and reseeding itself, which may cause the plant to die off sooner.
This ensures that your dill keeps growing throughout the season, allowing you to harvest more leaves for your kitchen, and keep the plant from going to seed too early in the year.
How to Prune Dill for Recipes and Drying.

When pruning dill for use in your kitchen or for drying, it’s best to snip off the fronds or sprigs from the plant before it starts to flower. This ensures the dill stays flavorful and doesn’t lose its strength or flavor when drying. For recipes like salad, pickles, or adding to fish and eggs, you can simply trim the leaves and stems to add a savory touch.
The key is to cut just enough for your recipe, leaving at least a third of the plant intact to keep it growing and producing more.
If you plan to dry dill for later use, follow a few simple rules. Cut the fronds from the stems and tie them together with twine to create a bouquet. Hang them upside down in a well-ventilated space, such as a curtain rod in a dark room or a container in your house.
Allow the dill to dry completely for a few weeks before storing it in an airtight jar or cupboard. This method makes dried dill easy to store and use later in your pickling or spices.
If you’re looking for a slow-to-bolt variety like Fernleaf Dill, it’s ideal for gardening in containers or small spaces, as it stays compact and produces plentiful dill for both fresh and dried uses. Dill from these varieties is perfect for pickling, flavoring garlic, cucumbers, and even adding a fresh touch to pickles or other savory dishes.
Whether fresh or dried, dill adds a special flavor to your kitchen, and following these outlined steps will help ensure you have flavorful herbs all year long.
Cut branches off the main stem when you’re planning to store dill:
When you’re planning to store dill, it’s important to cut the branches off the main stem in a way that prevents damage and keeps the plant fresh. Use sharp shears to cut the shoots at a perpendicular angle, about 1 inch (2.5 cm) above the joint.
This method ensures you don’t cause any decaying or stress to the plant. The small cuts help the dill maintain its fresh quality while you’re storing it, and it helps prevent the stems from becoming too dry or brittle.
How to Prune Dill for Seed-Saving.

When you’re pruning dill for seed-saving, it’s important to leave the seed-producing heads intact while ensuring the plant has enough energy to produce strong, healthy seeds. Prune the stems back regularly, cutting off small and yellow leaves or any parts that are not essential. Allow the flower to mature fully and finish producing before harvesting the seeds.
Once the dill has dried and the flower heads have turned brown, you can shake the heads into a paper bag to collect the seeds. This process ensures the seeds are ready to be stored, and it helps to prevent forcing the plant to use up too many nutrients before harvesting.
To save the seeds for next year’s crop, make sure the dill has fully matured before collecting the seeds. The dried flowers should be completely finished before you prune them for storage. Once collected, you can secure the seeds in an airtight container to keep them fresh and ready for growing the following season.
By following this careful pruning and harvesting process, you’ll have a steady supply of seeds for future planting while ensuring your dill plant continues to thrive.
Post-Flowering Pruning:
After your dill has flowered and seeds have been harvested, it’s a good time to trim the ragged stems and leaves. Pruning the plant back will help rejuvenate it for the next growing cycle.
By cutting off the spent flowers and any unnecessary growth, you allow the plant to focus on fresh growth, making it more productive and healthier in the coming months. This simple step will help maintain the vitality of your dill and ensure it continues to thrive.
Save seeds by hanging the plants upside down in a bag:
To save seeds, cut the plants once the flowers have appeared and started to bloom. Hang the stalk upside down in a bag, ensuring the seeds are allowed to fall into the bag as they drop off naturally.
This method works well if you wait until the seeds are fully dried and ready for collection, typically around 4 inches (10 cm) below the flower. By placing the plant in a well-ventilated area, the seeds will fall out without the risk of contamination.
How to Prune Dill Seed Heads.
If you’re interested in saving dill seeds for next year, prune the seed heads once the flowers have turned yellow and the seeds have started to dry. Remove the seed heads carefully to collect the seeds, making sure not to damage them.
This method prevents self-seeding in your garden while allowing you to save the seeds for cooking or planting next year. Be sure to handle them gently to ensure they stay intact for future use.
After Pruning.

After pruning your dill plant, it’s important to make sure the plant has the best chance to recover and continue growing robustly. Be mindful of watering—too much can rot the root and hinder growth, so prevent over-watering by ensuring the soil is well-draining.
Make sure your dill has the right amount of water and nutrients to reach its full potential, allowing it to thrive and grow strong. With the right care, your dill will bounce back and keep producing.
General Maintenance:
To keep your dill plant healthy, it’s important to regularly check for diseased or yellowing leaves and remove them. This not only improves the plant’s appearance, but it also helps to ensure the plant’s energy is directed towards healthy growth.
By removing unhealthy parts, you allow the plant to focus on producing fresh, vibrant leaves, which will improve overall growth. If you notice any signs of trouble, promptly addressing them will keep your dill thriving throughout the season.
Special Considerations:
When growing dill, it’s important to make adjustments based on your location and lighting conditions. For instance, in regions like Florida, where the sun can be intense, make sure to provide some shade to prevent the plant from getting crowded or overheated.
Using an Aerogarden system or similar growing methods can help you control the lighting and space effectively. Regular pruning is also key to maintain healthy growth, ensuring that the plant’s energy is not wasted on overcrowded areas. Dill grows best when its growth pattern is not hindered by intense sun or too little space, so careful pruning and adjustments can make all the difference in helping it thrive.
How to Prune Dill for Storage.

When you’re pruning dill for storage, the goal is to cut the plant at the end of the season, before the plant starts blooming or flowering. This allows you to harvest the leaves while they’re still at their full potential. Use a pair of sharp shears to carefully cut the stems and leaves into small bundles, making sure to remove any large stems that may not dry well.
You can then hang the bundles upside down in a well-ventilated area, ensuring that the dill stays away from moisture which could cause it to spoil. Allow the dill to dry for about two weeks, and make sure it’s completely dried before storing it in a clear container or glass jar.
To preserve the freshest dill, keep the dried herb in a cool and dry place to ensure it stays in good condition throughout the year. Pruning the plant properly will help it dry evenly and avoid excess moisture, which could affect the quality.
For long-term storage, you can also freeze the dill in small amounts, but make sure to harvest and prune before the plant flowers to keep the flavor at its best. This method will allow you to enjoy your dill all year round, preserving its fresh taste for your favorite recipes.
Store dill in a jar in the refrigerator:
To store dill for a longer time, snip the stems and place them in a mason jar with about 2.5 inches of water at the bottom. Fit the jar with a lid and make sure the stem-side is facing down to keep the dill fresh. You can add a rubber band or plastic bag around the jar to secure it, but ensure the lid is on tightly so the herb won’t lose moisture.
Place the jar in the fridge, where it will stay fresh for up to 2 weeks. This method keeps your dill vibrant and ready to use in your recipes whenever needed.
Harvesting Dill at the End of the Season.
Spray the dill with water the day before you harvest it:

Spraying your dill with water the day before you harvest it helps ensure the plant stays fresh and clear. By watering the whole plant, you help reduce the chances of dirt sticking to the stems and flowers, which can lead to decay.
This simple step ensures that when you cut the dill, it hasn’t dried out or been exposed to harsh conditions. Just make sure not to wait too long after spraying, as dill is best harvested when the plant has been properly hydrated.
Cut dill to the ground at the end of the growing season:

At the end of the growing season, it’s a good idea to cut your dill plant back to the base using sharp shears. This is especially important for annual plants like dill, as pruning them at the end of the season helps prevent any unnecessary growth and keeps the garden tidy.
Simply trim off the stems near the ground to ensure that the plant won’t continue to take up space or energy during the colder months.
Cut the dill in the morning to ensure the plant has moisture:

To keep your dill hydrated, it’s best to cut it in the morning when the plant has had a chance to absorb moisture overnight. This ensures that the stems are full of water and the plant isn’t stressed from being cut later in the day. If you wait until the afternoon, the plant may not have the same level of moisture, which can cause the flowers to wilt more quickly.
Leave the dill in a cool place or in a glass of water if you can’t use it immediately. Cutting it in the morning helps the plant stay hydrated longer, making it easier to use for recipes or drying.
Hang the dill to dry:

After you pick your dill, it’s time to hang it to dry. Gather the leaves into small bunches and tie them together with a rubber band or string, ensuring the bundles are tight but not loose. Hang the dill in a dark, warm area with good air circulation to promote even drying and prevent any mold growth.
Make sure the space has low humidity, as too much moisture can discourage proper drying. After about 1-2 weeks, check the dill to see if it’s completely dry. Once the whole plant is ready, store it in an airtight container like a jar, making sure the dill doesn’t crumble when you check it.
This method also works well for storing dried flowers for long-term preservation, helping maintain the freshness and flavor for future use. Properly drying and storing your dill will keep its flavor intact for future recipes or pickling.