
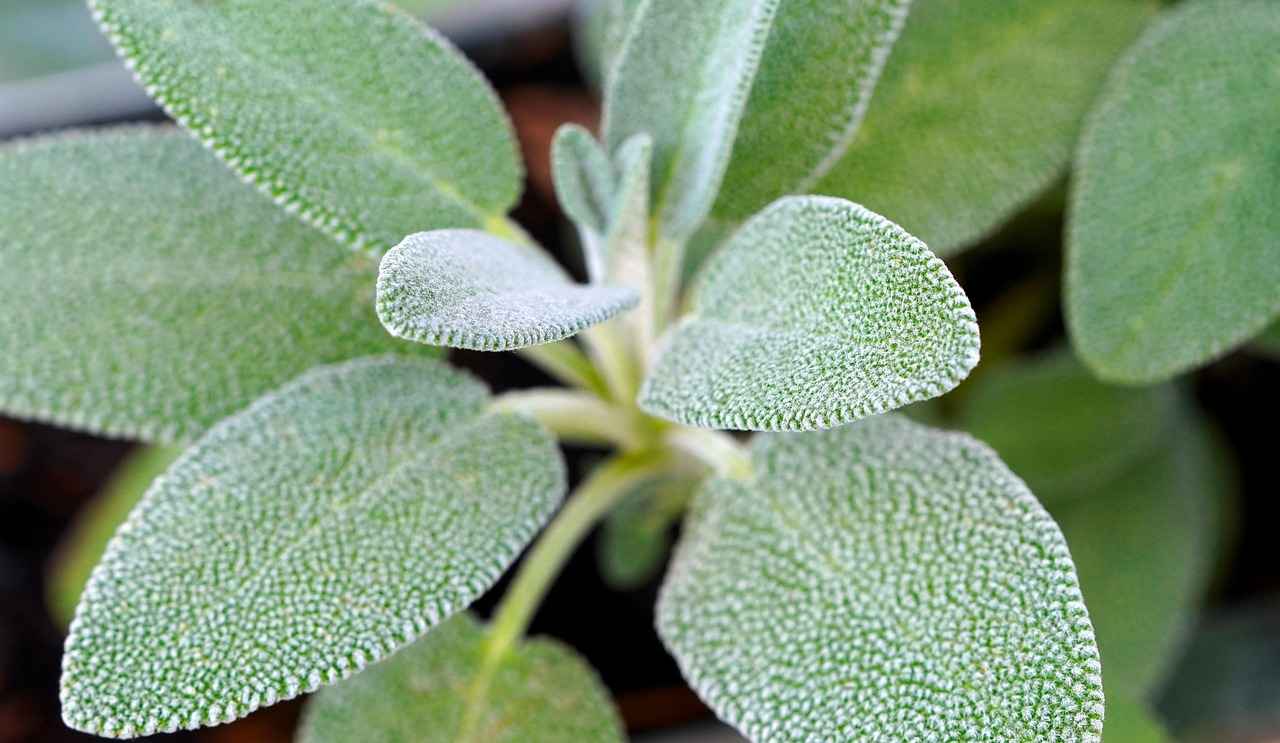
Sage is a semi-evergreen herb with a fragrance that’s both sweet and savory, making it a must-have in any kitchen. Its gray-green leaves not only add beauty to gardens and herbal beds but also bring a strong earthy flavor to a variety of dishes. Whether you’re growing it for its culinary benefits or its essential oils, sage is a versatile herb worth cultivating.
With its origins in Mediterranean regions, it thrives in well-drained soil and sunny spots, ensuring you can maximize its growth potential for cooking and holiday preparations.
When it’s time for harvesting, picking fresh leaves early in the day yields the best results. Dried or frozen, sage retains its sharp flavor, ready to elevate your pasta, potato,
or even turkey recipes. Create small bundles to preserve its aroma, or use it fresh to add a musky, woody touch to your favorite meals. With simple instructions and a little art, you can store and celebrate this evergreen herb year-round, transforming your kitchen into a haven of herbs and health.
How to Harvest Sage
To harvest sage, pick leaves in spring or early summer, just before flowering, when oils are most aromatic. Use clean shears to trim the top leaves or stems in the morning after dew dries. Avoid overharvesting; take only up to one-third of the plant to encourage regrowth.
About Sage Herbs:
Understanding the Basics of Sage:

Sage is a perennial herb with long, narrow leaves that feel pebbly to the touch and range from gray-green to purple-green in color. This fragrant member of the mint family is an essential addition to any garden, offering both medicinal uses and culinary versatility.
The woody stems and crunchy texture of sage make it ideal for enhancing meat, poultry, and squash dishes, while its unique flavor complements sauces and pumpkin recipes. Its antiseptic properties are perfect for brewing tea to soothe a sore throat or aid digestion, and it has long been used to cleanse spaces of negative energies and odors.
During the harvest, the leaves are at their peak for drying or using fresh in the kitchen. Lightly fried sage leaves can be a tasty topping, while its buttery flavor shines in soups and stews. Beyond its culinary role,
sage’s burning tradition is said to clear spirits and uplift moods. Keeping it in your cabinet ensures you always have this multi-purpose herb on hand for its countless uses, whether in dishes, teas, or rituals.
Sage Varieties and Their Uses:
Sage, or Salvia as its scientific name, belongs to the Lamiaceae family alongside mint, oregano, thyme, and rosemary. With over 900 species found worldwide,

this aromatic herb has been cultivated for centuries for its culinary, medicinal, and religious purposes. Common sage (Salvia officinalis) is the most popular for gardens and kitchens, while White sage (Salvia apiana) is cherished in rituals and religious ceremonies.
Ornamental varieties like Blue sage (Salvia farinacea) and Victoria sage are known for their vibrant blooms and ability to thrive in different environments. Sage is easy to grow and prized for its slightly aromatic leaves, making it a versatile choice for herbs in any setting.
Common Sage:
Common sage is a perennial herb that adds beauty to any garden with its fuzzy, soft green leaves and purple-blue flowers. It thrives outdoors in full sun with well-draining soil and is both hardy and drought-tolerant.

To grow sage, plant seeds or seedlings 2-3 feet apart in moist, nutrient-rich soil, but avoid letting it become soggy. Trim woody branches regularly to encourage growth and maintain its tender, edible quality.
Sage plants can last 4-6 years, though they may need to be replaced or transplanted if they become overgrown. Their natural ability to repel insects also makes them a useful addition to any garden.
In the kitchen, sage leaves are prized for their subtle yet rich flavor, often used fresh or dried for culinary purposes. They elevate the taste of roasted meats, soups, and salad dressings. Bundling sage and burning it over a campfire creates a soothing aroma, while its bay-like undertones pair wonderfully in both traditional and modern recipes.
Start your plants early indoors to let seeds germinate, then transfer them when the risk of frost has passed, planting them at least 1/4 to 1/2 inch deep for optimal growth.
White Sage:
White sage is a perennial herb native to California, cherished for its sacred role in American traditions like smudging, where its aromatic smoke is used for purifying spaces.

White sage is a perennial herb native to California, cherished for its sacred role in American traditions like smudging, where its aromatic smoke is used for purifying spaces.
This hardy plant thrives in sunny, drier environments and prefers full sun with plenty of room to grow. Its silvery-green leaves and pine-like aroma make it visually and aromatically appealing for gardens in warmer zones. For colder areas, it can be grown in a pot and moved indoors during cooler weather.
To grow white sage from seeds, ensure proper germination by planting them in well-draining soil and using water sparingly to mimic its natural habitat.
In the kitchen, while white sage is less common for cooking than other herbs, its aroma can enhance baked goods and spices when ground. It has a strong,
earthy flavor that pairs well with traditional foods like maize or pinole, a ball-shaped mix of edible goods. Its flowers can also attract pollinators, helping to recreate a natural garden environment. Whether used in smoke rituals, as incense, or for its aromatic qualities, white sage brings a versatile and sacred presence to any garden or home.
Victoria Blue Sage:
Victoria Blue Sage is a stunning ornamental plant from Mexico and Texas, admired for its vibrant blue blooms and shiny green foliage. This perennial in warmer zones thrives outdoors in well-drained soil under full sun or partial shade.

Known for being drought-tolerant and pests-resistant, it is a fuss-free addition to any garden. The tall stems, reaching 6-8 weeks of continuous blooms, make it ideal for beds and wildlife areas. Its cup-shaped flowers attract hummingbirds, butterflies, and other pollinators, enhancing the beauty of your landscape.
This variety, also called Mealycup Sage, can be grown from seed or as an annual in regions with frost. Regularly trim old or leggy parts to encourage fresh colors and survival in cooler months.
For those in colder climates, Victoria Blue Sage can be brought indoors or added to a Collection of indoor plants. Native to the U.S. and America, its aromatic presence and vibrant flowers make it a versatile and reliable choice for both garden beds and decorative addition to your space.
When to Harvest Sage:
The best time to harvest sage is in spring or early summer, just before the plant starts flowering. This is when the essential oils in the leaves are at their peak, providing the strongest aroma and flavor.

To maintain the plant’s health and encourage further growth, it’s ideal to trim the leaves lightly, ensuring the plant remains bushy. Harvest in the mid-morning, once the dew has dried but before the day gets too hot, to capture the best qualities of the leaves.
For long-term use, sage leaves can be turned into preserved dried flowers, which are perfect for both decoration and practical uses like seasonal arrangements or traditional ceremonies.
If harvesting later in the season, such as mid-summer or early August, wait until the plant has matured after its first bloom. At this stage, you can trim larger portions,
especially if you’re gathering sage for culinary purposes or preserved dried flowers. Dry the leaves and flowers in a well-ventilated, shaded area to retain their aroma and natural beauty for extended use in your garden or home.
Recognizing the Right Time to Harvest:
The best time to start harvesting sage is just before the buds or flowers appear, as this is when the flavor is most potent. If you’ve recently started planting seeds, allow the plants to establish for their first year to encourage strong roots and healthy growth.

Once the plant is solid and well-developed, you can pluck or lightly trim the leaves for use. Aim to pick in the early morning during warm days to preserve the flavor and oils.
For established plants, you can harvest up to 75% of the plant’s leaves without harming it, but always avoid over-trimming to allow for future blooms.
It’s a good idea to extend the harvestable period by maintaining the frame of the plant and only taking what’s needed. This ensures the plant remains healthy and productive even through winter.
First Year Patience: When is Sage Ready to Harvest?

When planting sage, it can be tempting to rush the process, but like corn cultivation in portable containers, success depends on giving the plant the right time and environment to grow.
During the first year, focus on allowing the plant to channel its energy into root and leaf development, which ensures it will thrive in future years. By waiting for these initial stages to strengthen the plant, you set the stage for a bountiful harvest in the second year.
Although waiting takes patience, it pays off with healthy, thriving sage plants that are ready to provide abundant leaves for years to come.
Seasonal Harvesting:

The optimal time to harvest sage is during early summer and fall, as the intensity and flavor of the leaves are heightened during this period. In temperate climates, the aromatic profile of sage reaches its peak, making it perfect for culinary and medicinal use.
As the pre-winter months approach, the essence of the leaves becomes more flavorful, offering a rich and pivotal addition to your favorite herbs. However, the window for harvesting can vary based on seasonality and sunlight,
with late summer being an exception for reduced growth. Understanding this balance ensures you capture the best sage leaves for their aromatic and flavorful qualities.
After Blooming?:

The post-blooming stage of sage is a simple yet important phase for harvesting. Many questions revolve around whether this is the best time to collect leaves, and the answer depends on what you are seeking.
After flowering, the oils and essence of the leaves become slightly milder, leading to a milder flavor but retaining the signature taste that makes sage aromatic and versatile. This stage ensures the plants remain healthy while still providing usable leaves for your garden needs.
The caveat is that while the concentration of oils may not be at its peak, the leaves are still excellent for those looking for a more balanced taste in their cooking or herbal blends.
How to Harvest Sage:
The best time to harvest sage is in spring or early May, just before the plant starts flowering, as the oils and flavor in the leaves are at their most aromatic.

Use sharp secateurs or your thumb and forefinger to pick the topmost leaves or tender shoots, ensuring you leave enough for the plant to recover and continue growing. Trim back the stalks to just above the base, where the young shoots are developing, to avoid causing damage to the plant.
Mid-morning is an ideal time, as the dew has dried and the leaves are clean. For larger plants, limit the harvest to 15-20 cm sections to maintain the shape and energy of the plant.
For drying, bundle the stems together and hang them in a well-ventilated, shaded area for a few hours. This prevents mold and helps retain the sharp, distinctive flavor of the herb. Once fully dried, the leaves can be crumbled and stored in a sealed container to keep their aromatic quality intact.
If you prefer immediate use, fresh leaves are excellent for cooking, adding a strong and vibrant flavor to your dishes. Be sure to replace any woody or older plants after several years to ensure a continuous supply of fresh, hardy herbs.
Regular trimming and pruning throughout the growing season help reinvigorate the plant and encourage continuous growth. Harvesting in late August or early fall can prepare the plant for winter, as it concentrates its energy on the roots and main stalks.
Keep an eye out for any insect spots or damaged areas to prevent them from spreading, and always harvest with clean tools to maintain plant health. With proper care and attention, your sage plants will provide an abundant supply of fresh and dried herbs for years to come.
Step-by-Step Guide to Harvesting Sage:
Tools You Need:
Having the right tools is crucial for maintaining the health and longevity of your plants, especially when caring for sage. Use sharp shears or scissors with clean blades to make precise cuts, minimizing the risk of introducing diseases to your garden.

Disinfecting your tools regularly is essential, as it helps in ensuring a clean environment and prevents contamination. Simple gardening tools are often more effective than complex alternatives, as long as they are kept in good condition.
By cleaning and maintaining your equipment, you can safely perform tasks like harvesting and trimming without harming your plant or spreading disease.
How to Pick Sage:

When picking sage, use a gentle technique to avoid bruising the leaves and causing stress to the plant. The specific method involves using scissors or shears to snip the stems just above where they intersect with another branch.
This approach ensures minimal handling and helps to promote growth for future harvests. Focus on vibrant, healthy leaves for the best aromatic quality while leaving enough foliage to keep the plant productive.
Avoid picking more than one-third of the plant at a time to maintain its health and ensure continuous growth. By following this method, you can enjoy regular, high-quality harvests without harming your sage.
How to Prune Sage:

Pruning sage is essential to keep the plant healthy and productive. Start in late winter, around February, by using a hand clipper to remove any damaged or discolored leaves. Focus on cutting back no more than one-third of the total growth, ensuring you leave enough foliage for the plant to remain viable.
Make each cut just above a node to encourage fresh growth and fine new shoots. Discard the old or unhealthy cuttings, but save the fresh, small leaves for use in cooking or drying for their flavor. With proper pruning under the right conditions, your sage will thrive and continue growing in your zone for seasons to come.
Harvesting for Specific Uses:

Culinary Uses:
Sage is a versatile herb that adds a potent aroma and depth of flavor to a myriad of recipes. Whether used fresh or dried, its leaves bring a distinct taste that complements poultry, butter-based dishes, and even creamy risottos.
Fresh sage is often the choice for its vibrant flavor, while dried counterparts work well in marinades and slow-cooked meals. Its unique aroma elevates the simplest dishes into a culinary delight, making it a best addition for both savory and aromatic creations in the kitchen.
Smudging:
Smudging is an ancient ritual that uses sage to cleanse spaces and individuals of negative energies. The process involves harvesting mature leaves, drying them, and forming them into smudge sticks that can be burned.
This ritual is ideal for creating a peaceful area or refreshing the energy of a specific surface. Larger leaves are often preferred for their ability to produce a broader smoke that effectively purifies the spaces. By following this traditional practice, you can create a harmonious and revitalized environment.
How to Dry and Store Sage:
Drying Your Harvest:

Drying sage is a simple way to preserve its aromatic essence and ensure it’s available year-round for recipes, teas, or other uses. Start by gathering healthy cuttings of stems with leaves attached. Lay the sage flat on a paper towel or tie it into small bundles with string or elastic twine.
Hang these upside down in a well-ventilated, airy space away from direct sunlight to avoid degrading the flavor and vibrant green color. This natural method usually takes about a week to ten days for the sage to completely dry.
For faster results, you can use an oven or dehydrator. In the oven, spread the leaves on a baking tray lined with a towel and keep the temperature at a low-temperature setting, around 115°F (60°C), to avoid losing the essential oils.
Check every few hours and remove the leaves when they crumble easily. A dehydrator offers a more controlled temperature to ensure even drying without the risk of mold. Once dry, the leaves can be kept whole or crumbled depending on your dishes and recipes.
Store your dried sage in airtight containers or plastic bags to retain its flavor and aroma. Use single-use bags for small amounts or divide into portions for the season. If you want to maximize its potential, you can also freeze the sage in the freezer by spreading the leaves on a flat tray before transferring them to airtight bags.
Properly stored, dried sage remains aromatic and flavorful for up to a year, ready to enhance your cooking, tea, or herbal blends.
Storing Sage:

Storing sage properly is important to preserve its flavor, aroma, and essential oils for later use. Start by ensuring the leaves are completely dry to prevent mold or discoloration.
For dried sage, keep the whole-leaf form intact to retain its longest shelf life. Bundle the stems loosely with a cloth or paper towel and hang them in a cool, dry place until ready to store. Once dry, gently rub the leaves between your palms to crumble them, or keep them whole if preferred. Store the sage in glass containers with tight-fitting lids to lock in freshness.
If you are storing fresh sage, first wrap the leaves in a damp towel and place them in the refrigerator to maintain their quality for a short amount of time. For long-term storage, consider freezing fresh sage.
Place the stems flat on a tray to freeze, then transfer them to containers or freezer bags. This helps avoid clumping and makes it easy to remove only what you need for cooking or ceremony.
When storing sage for food, teas, or smudging, choose a method that suits your needs. For culinary use, you can grind dried sage in a grinder to make a powder or add small amounts to oils for infused seasoning.
If using sage for Medicine Person ceremonies or smudging, keep the sage tied in bundles or in its whole-leaf form to ensure it stays intact. Properly stored sage can last up to a year and remains a versatile and essential herb for a variety of purposes.
Freezing Sage:

When you have little time or extra space in the kitchen, freezing sage can be an easy and fitting solution to preserve its flavour for the entire year.
Instead of drying, which may result in a crumble texture, freezing allows you to take individual leaves and store them frozen for adding to your recipes directly. For a better result, place the leaves in a pot of olive or butter oil and freeze them in individual cubes.
This way, when it’s time to cook, you can just pop out the frozen cubes and stir them into your sauces or any dish that requires a little extra sage. Compared to drying, freezing helps you keep the herbs better and fresher, providing an immediate boost to your dishes without overcomplicating your cooking process.
It’s particularly great for preserving that quick burst of flavour in your meals.
Sage Ice Cubes:

Making sage ice cubes is a fantastic and novel way to preserve the flavor and freshness of sage for future use. Start by chopping the leaves finely and placing small amounts into each section of an ice tray, ensuring they are evenly distributed.
Fill the tray with water or sage-infused oil, ensuring the sage is fully submerged, and freeze until frozen solid. These cubes can be popped out and stored in a freezer bag for easy use.
When added directly to hot soups, stews, or other dishes, the cubes will melt and release a burst of fragrant flavor, making this method a beneficial option for infusing your meals with a touch of fresh sage.
Tips for Preserving Sage:
Sage often grows abundantly during the summer, making it a great idea to focus on preserving your harvest for the winter months. Start by choosing fresh leaves at their peak and exploring different methods like drying, freezing, or creating sage-infused oils.
These approaches ensure a generous yield that can be used in various dishes throughout the year. For a continuous supply, it’s worth supplying your kitchen with sage in forms that read easily into recipes, keeping its flavor intact.
By preserving it well, you’ll always find the taste of fresh sage ready for your cooking needs.
Tips for Harvesting Sage
-Lightly harvest from established plants during their growing season.
-Select blemish-free, green/gray leaves for the best quality.
-Cut stems about 4-5 inches in length using sharp scissors or pruners.
-Harvest one-third of the plant at a time to promote new growth and avoid overcutting, which can stress the plant.
-Trim just before flowering to encourage a bushier shape and make the plant more robust for the next season.
-Remove damaged or old portions to maintain the plant’s overall health.
-For larger harvests, aim for late summer or prior to winter to allow the plant time to recover.
-Focus on solid, green stems with healthy leaves and leave enough foliage for the plant to continue growing.
-Properly store sage after cutting by drying or freezing to preserve its flavor and color.
-Keep the portions in airtight containers to enjoy your harvest throughout the year.
-Following these steps will ensure your sage remains healthy and provides fresh herbs season after season.
Supporting Healthy Plants
Avoiding Plant Diseases:

Keeping your sage and other plants healthy requires understanding how to prevent common diseases. Practicing regular gardening hygiene is vital, including disinfecting tools after use to avoid spreading infections.
Watch for early signs like spots, discoloration, or unusual growth on the leaves, and act preemptively by removing affected areas. Avoid over-watering, as it can lead to fungal issues and reduce the quality and health of your herbs. Keeping soil well-drained and ensuring proper air circulation can help deter potential problems before they occur.
To ensure the longevity of your plants, focus on treating issues as soon as they arise and preserving the highest quality of your harvest. Catching problems early can save your plants from severe damage and maintain the health of your garden. Simple steps like regular inspection and proper watering techniques are essential for keeping your sage and other herbs thriving and disease-free.
Expanding Your Herb Garden
Once you’ve mastered the art of growing and harvesting sage, it’s time to stop and think about expanding your herb garden.
Adding new herbs like basil, thyme, or mint can bring exciting flavors and aromas to your space, while also offering the therapeutic benefits of diverse cultivation.
Plan small plots that meet the specific requirements of each herb, creating a world of diversity right in your garden. This project can be a rewarding adventure for both beginner and experienced gardeners, helping you explore the similar joys of growing other plants and enjoy their benefits for cooking and wellness.
Incorporating Other Herbs: Thyme, Oregano, Rosemary

Thyme:
Thyme is an aromatic herb that’s perfect for home gardens and widely used in kitchens for its tiny leaves packed with flavor. The best time for harvesting is just before the flowers bloom, as this ensures the most intense fresh taste.
Use scissors to snip stems, leaving enough foliage for regrowth. After harvesting, the leaves can be stripped from the stem and dried to capture their essence for long-term storage or immediate use in your favorite recipes. Whether fresh or post-harvest, thyme is a versatile addition to enhance any dish.
Oregano:
Oregano is a flavorful and fragrant herb that can thrive year after year in your garden. The best time to harvest is just before the flowers bloom, as this is when the leaves are most rich in oil and flavor.
Focus on cutting the top stems, leaving the woody base intact to encourage robust regrowth. Always harvest no more than one-third of the plant at a time, ensuring it continues to thrive. Like its companion rosemary, oregano is a culinary staple that adds depth to many dishes and can be easily harvested for fresh or dried use.
H4:Growing Sage Indoors

Growing sage indoors can be a rewarding way to enjoy fresh herbs year-round. To successfully grow sage indoors, start by selecting containers or clay pots with good drainage, as sage does not require a rich, fertile potting medium but does need a well-drained soil to flourish.
Place your potted herb in a spot where it gets at least six to eight hours of sunlight daily, such as a sunny window. If sunlight alone is not enough, consider using artificial lighting, like a double fluorescent tube mounted underneath cabinets or over a countertop, to provide the additional light required.
Sage needs 14 to 16 hours of light daily to grow abundantly, so if natural sunlight is limited, supplemental lighting is essential. Keep the lights about 13 to 15 cm (5 to 6 inches) away from the plant to avoid overexposure while ensuring the leaves get enough light.
Rotate the pot every two hours to ensure the entire plant gets even light distribution, which helps it flourish indoors. Give the plant care by watering moderately, allowing the soil to dry slightly between watering sessions, as sage thrives in a low-humidity environment.
When learning how to grow sage indoors, it’s important to improve the growing situation by monitoring light and watering needs.
A full-spectrum artificial light can assist if your home lacks a sunny window. With the right soil, containers, and light setup, sage can thrive indoors, providing you with fresh herbs for cooking and garnishing several dishes.
With a bit of patience and care, you’ll find that growing sage indoors is a perfect way to start your indoor herb garden.